Blog · Part of the Getting Started guide
OnlyFans Lighting Setup: Look Professional on Any Budget
A practical guide to OnlyFans lighting setups at every budget, from free natural light to professional softboxes, with tips for avoiding common mistakes.
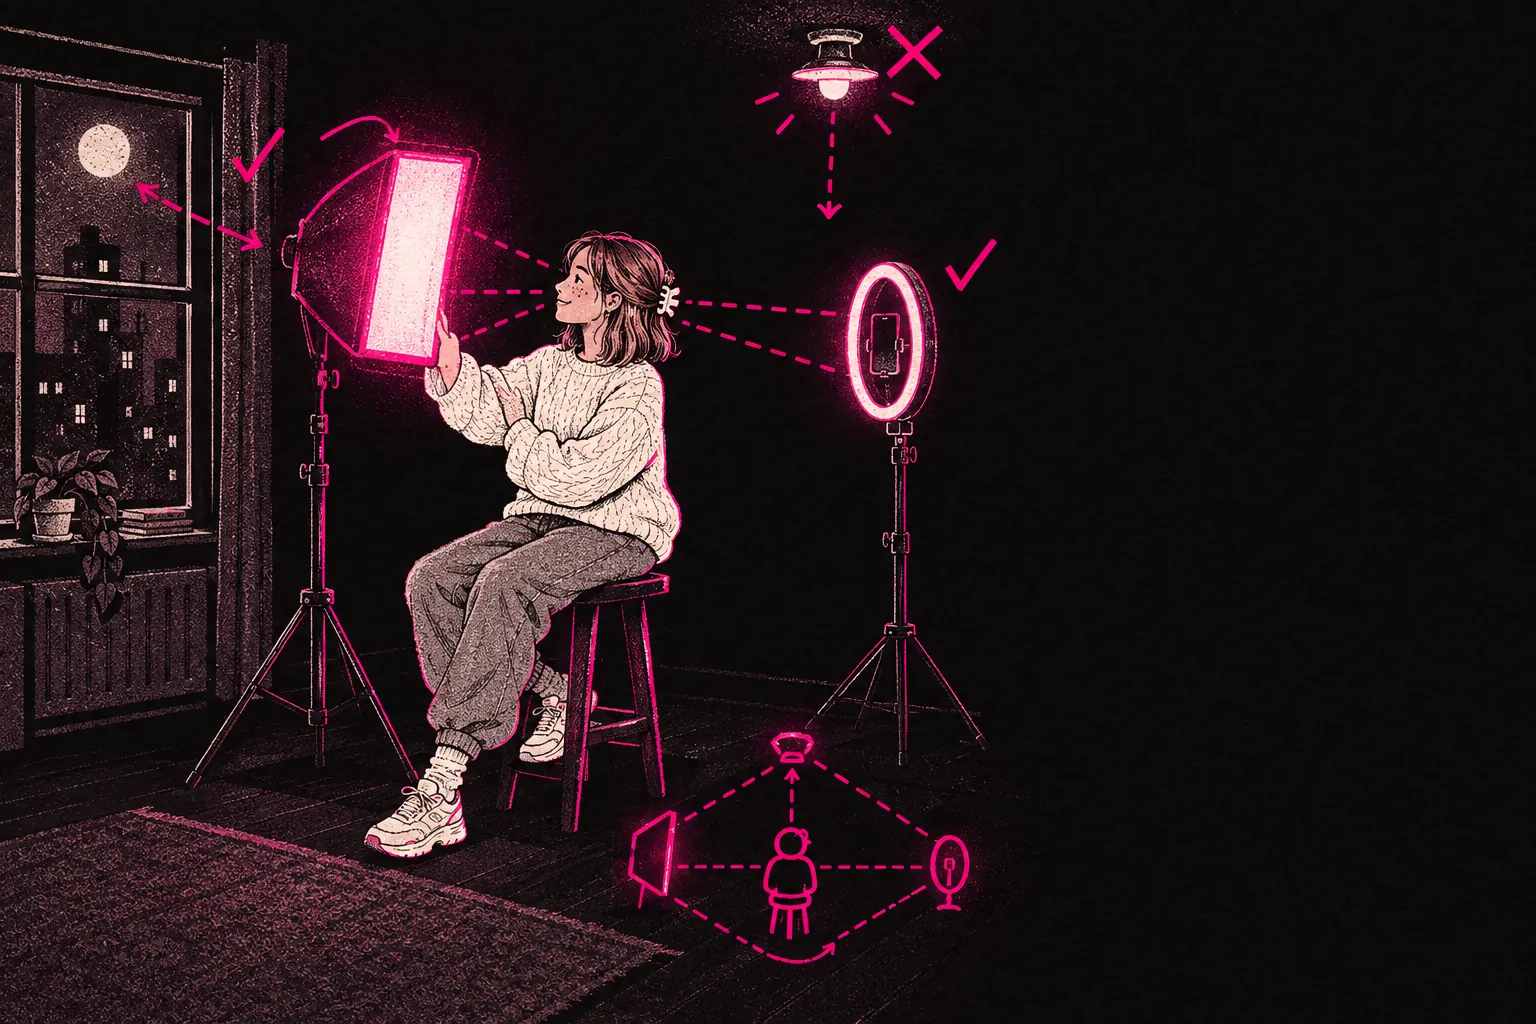
To look professional on OnlyFans, start with a big window on a cloudy day, move up to a ring light for around £25 to £40, and build a three-point setup with softboxes when you’re ready. Lighting does more than almost anything else to make content look polished instead of rushed, and you don’t need to spend hundreds of pounds to get it right.
You need to understand a few basics and avoid the usual mistakes. Everything below goes from using a window up to a full three-point setup, with product suggestions at each price point.
Why lighting matters more than your camera
Before you spend money on a new phone or camera, think about this. A well-lit photo on a five-year-old phone will usually look better than a badly lit photo on the latest iPhone. Good lighting cuts down grain, evens out skin tone, softens unflattering shadows and keeps colours accurate.
Bad lighting makes your camera compensate. That means a higher ISO (more grain), slower shutter speeds (more blur) and colours that look off. Editing can’t fully rescue a badly lit image.
Natural light: free and remarkably effective
If you’re just starting out and can’t spend anything on kit, natural light is your best friend. A big window on an overcast day gives you soft, even light, the same look plenty of artificial setups are trying to copy.
How to use it well
- Face the window. Stand so the window is in front of you or slightly to one side. Never shoot with a window behind you, unless you want a silhouette.
- Pick overcast days. Direct sunlight throws harsh shadows. Cloud cover works like a giant diffuser, softening the light so it wraps around your face and body.
- Use a white sheet as a reflector. If one side of your face or body is noticeably darker, hang a white sheet or hold a piece of white card on that side. It bounces light back and fills in the shadows.
- Watch the time of day. Midday sun through a window can be harsh. The hour after sunrise and the hour before sunset give you warmer, softer light.
Limitations
Natural light is unpredictable. It changes with the weather, the time of day and the season. You can’t shoot at midnight, and it’s hard to get the same look twice. Once you’re making content regularly, you’ll probably want light you can control.
Ring lights: the popular starter option (£15 to £50)
Ring lights took off with influencers for a reason. They give you even light from the front that keeps shadows down, plus a flattering sparkle in your eyes.
What to look for
- Size. A 10-inch ring light is fine for close-ups of your face, but for anything wider than head and shoulders you’ll want an 18-inch one.
- Adjustable colour temperature. Look for a light that switches between warm (3200K) and cool (5600K) tones, so you can match the room you’re in.
- Adjustable brightness. You need to be able to dim it. Full power is rarely what you want.
- A sturdy stand. The cheapest ring lights come with flimsy tripods. If the stand wobbles, the light’s no use.
Budget picks under £50
You can find a basic 18-inch ring light with a stand and phone holder for about £25 to £40 on Amazon. Neewer and UBeesize both make dependable ones. They won’t last forever, but they’re a good place to start.
Ring light limitations
A ring light only lights you from the front, so your content can look a bit flat, without much depth. Ring lights are great for selfie-style content, video calls and close-ups, and less suited to full-body shots or moodier lighting.
Three-point lighting: the professional standard
If you want your content to look polished, three-point lighting is the setup photographers and filmmakers use all over the world. It sounds complicated, but the idea is simple.
The three lights
- Key light. Your main light, placed to one side of the camera at roughly a 45-degree angle. It does most of the lighting.
- Fill light. Placed on the other side and set dimmer than the key light. It softens the shadows the key light makes, without getting rid of them completely.
- Back light (or hair light). Placed behind you, pointing at your head and shoulders. It separates you from the background and adds depth.
You don’t need three separate lights to do this. A window can be your key light, a reflector your fill, and a cheap LED panel your back light.
Mid-range setup (£80 to £150)
Two softbox lights on adjustable stands are the core of a dependable mid-range setup. Neewer and Raleno both sell two-light softbox kits in this price range. Add a small LED panel (£20 to £30) as a back light and you’ve got a proper three-point setup for under £150.
Why softboxes beat ring lights
A softbox is a bigger, more diffused light source. That means softer shadows, more natural-looking skin, and more freedom over where you put the light. The light wraps around you instead of hitting you flat from the front.
Common lighting mistakes to avoid
Mixing colour temperatures
This is probably the most common mistake. If there’s a warm lamp in the background and a cool ring light on your face, the image will look strange. Your camera can’t balance two different colour temperatures at once, so one will look orange and the other blue.
The fix: turn off background lights while you shoot, or set all your lights to the same colour temperature.
Overhead lighting only
The ceiling light in your room is almost never good for content. It puts shadows under your eyes, nose and chin, and makes you look tired and older. There’s a reason people call it “horror lighting”.
The fix: switch off the ceiling light and light yourself from the front or at an angle.
Too much light, no shadows at all
It sounds backwards, but you want some shadow. Completely flat lighting takes away all the depth and makes images look clinical. A little shadow on one side of your face makes it more interesting.
The fix: put your key light off to one side instead of straight in front, and don’t turn your fill light up to full.
Shooting under fluorescent or LED strips
Cheap LED strips and fluorescent tubes can flicker too fast for your eyes to notice, but your camera picks it up. You get banding in video and uneven exposure in photos.
The fix: use continuous LED panels made for photography, or test for flicker by recording a slow-motion video under your lights.
Tips for different content types
Photos (face and upper body)
Put a ring light or a single softbox slightly above eye level, angled down by about 15 degrees, for flattering, even light. For variety, move the light further to one side to get more dramatic shadows.
Full-body photos
You need a bigger light source, or a light further away from you. A softbox on a tall stand works well. With natural light, stand far enough from the window that the light covers your whole body evenly.
Video content
With video, keep your lighting the same all the way through. Once your lights are set, don’t move them mid-shoot. Use continuous LED lights instead of anything that might flicker. If you’re recording for more than a few minutes, check your lights aren’t overheating and shifting colour as they warm up.
Close-up and detail shots
A small LED panel, or even a desk lamp with a daylight bulb, can work well for close-ups. Put the light close to the subject for a softer look. For product shots or flat-lays, light from overhead through a diffuser works nicely.
A practical starter shopping list
If you’re starting from nothing and want a flexible setup that won’t cost much:
- One 18-inch ring light with stand (£30 to £40), as your key light
- One white foam board from a craft shop (£3 to £5), as your fill reflector
- One small LED panel (£20 to £30), as your back light or accent light
That’s roughly £55 to £75 in total. It gives you a basic three-point setup, and a big step up from shooting under the ceiling light.
What comes next
Lighting is one part of how you make content. If you’re thinking about upgrading your whole setup, our creator kit guide covers cameras, backdrops and other kit.
And if your content’s in good shape but you’d like help with strategy, growth and the day-to-day running of your page, you can see how we work with creators and whether it makes sense for you.
Start with what you’ve got. A window, a white sheet and some thought about where you stand will get you further than you’d expect.